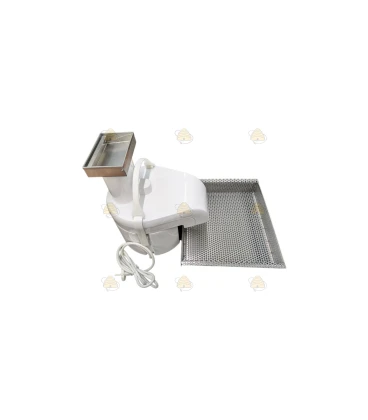
Bee Bread Harvester
€ 348,55
This small machine is specifically designed for hobby beekeepers. The hopper inlet is 85 mm wide, and with 250 W / 230 V and a weight of 7.4 kg, it is a compact, powerful solution. Before harvesting the bee bread, the combs must be prepared: (1) remove any residual honey by extraction and dry the combs completely in the hive – they must be honey-free, (2) break the combs into 85 mm wide strips, and (3) freeze them overnight at -18°C to -22°C.
The device can process up to 20 kg of bee bread per hour, with 80% to 98% purity, depending on the age and color of the combs. After harvesting, manual post-processing is required for further cleaning. The bee bread must be thoroughly dried before storage.
Key features:
- Power: 250 W / 230 V
- Weight: 7.4 kg
- Capacity: up to 20 kg/hour
- Purity: 80% – 98% (depending on comb age)
After harvesting, if the bee bread needs to be stored longer, it can be dried for 2 to 3 days at up to +42ºC. If the product is not dried properly, mold may develop. For long-term storage, the bee bread can also be frozen or mixed with honey, which preserves quality for up to a year.
Warning! Always unplug the device before disassembling or cleaning!
Customer ratings and reviews
Detailed instructions for preparing and harvesting with the bee bread harvester:
-
Placing the separator
Make sure to place the separator on a stable, level surface, such as a sturdy table. This is essential to ensure stable operation of the machine. Then place the bee bread harvester on the separator. Ensure the machine outlet faces the separator inlet so the bee bread and wax particles are correctly collected. -
Installing the sieve
Attach the small, perforated stainless steel sieve (part № 8) to the side of the separator. This should be done next to the inclined metal screen, which is designed to separate larger pieces of bee bread from smaller particles and wax. If you choose not to use the separator, place the sieve directly under the outlet of the harvester. This ensures the separated bee bread pieces are collected without too much wax or fine particles getting in the way. -
Checking the internal components
Before you begin, it is important to check that the internal metal comb threshing disc (part № 6) is properly seated. This component is crucial for threshing and separating the bee bread from the comb. If the disc was previously removed for cleaning or maintenance, carefully put it back. Then tighten the plastic screw (part № 7) firmly to prevent the disc from loosening during use. -
Installing the funnel
The next step is to correctly fit the metal funnel (part № 4). Do this by squeezing the legs of the funnel together and then inserting it into the opening of the top lid (part № 3). It is very important that the funnel is firmly secured to allow smooth feed of the bee bread. Also check that the machine is secured with both side clips so the top lid remains tightly closed during use. -
Powering on the machine
Switch on the machine by setting the switch (part № 5) to the working position “I”. At this point the motor will start and run at a constant speed, indicating the machine is ready for use. -
Start threshing
Once the motor is running, you can begin threshing the bee bread. Take the pre-prepared comb pieces and gently feed them through the top opening of the funnel (part № 4). Do not press the comb pieces down hard—the machine is designed to process the material smoothly without extra pressure. You can also watch an instructional video on YouTube for a detailed explanation: WILARA BBM – Bee Bread Harvester-YouTube. -
Manual sieving without the separator
If you are not using the separator, after threshing about 1 to 1.5 kg of bee bread you must sieve the obtained mixture by hand. Use the small stainless steel sieve to separate larger bee bread pellets from smaller bee bread particles and wax residues. This is an important step to improve the purity of the final product. -
Automatic separation with the separator
When you do use the separator, separation will occur automatically by gravity. The larger bee bread pieces are collected in the stainless steel sieve attached to the outside of the separator. The smaller bee bread particles and wax flakes will end up in the separator tray, making the separation process simple and efficient. -
Cleaning the machine
After threshing, it is essential to clean the machine thoroughly. Start by removing the top lid (part № 3). Then remove the funnel (part № 4) from the machine and take out the threshing disc (part № 6) by loosening the plastic screw (part № 7). Thorough cleaning ensures the machine stays in good condition and lasts longer. -
Storing bee bread
After harvesting, the bee bread must be properly dried before long-term storage. Dry the bee bread for 2 to 3 days at a maximum temperature of +42°C or +43°C. If it is not dried properly, the product may remain moist and develop mold. Although fresh (moist) bee bread is more valuable for human consumption, if you are not using it immediately, it should be refrozen or mixed with honey to preserve its best properties.
Important safety note
Always make sure the machine is switched off and unplugged before you begin dismantling or cleaning parts. This prevents possible accidents and ensures safe use of the machine.
With these comprehensive steps, you ensure the bee bread harvester is correctly prepared, used, and maintained, resulting in an efficient and clean harvest of high-quality bee bread.


